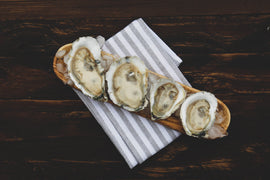

There's something truly delightful about the experience of indulging in freshly shucked oysters. The anticipation, the delicate flavors, and the joy of savoring a briny delicacy – it's a culinary journey that's hard to beat. If you're new to the world of oyster shucking, fear not! With a little guidance and the right tools, you'll be enjoying your own freshly shucked oysters in no time. Let's dive into a beginner's guide to using an oyster shucker.
Step 1: Gather Your Tools
Before you embark on your oyster shucking adventure, make sure you have the necessary tools on hand. Here's what you'll need:
Oyster Shucker: Also known as an oyster knife, this tool is designed to easily pry open oyster shells.
Towel or Glove: Protect your hand from slips and sharp edges with a towel or a cut-resistant glove.
Oysters: Of course, you'll need fresh oysters. We offer premium oysters harvested from the Chesapeake Bay – a perfect choice for your shucking journey.
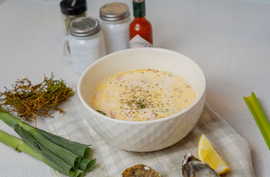
Optional: Lemon, Mignonette Sauce, Hot Sauce: These accompaniments enhance the flavor of your shucked oysters.
Step 2: Safety First
Oyster shucking is a skill that requires some practice, so prioritize safety. Make sure your oyster is properly cleaned and free from dirt. Hold the oyster firmly but gently to prevent any accidents.
Step 3: Inserting the Oyster Shucker
Hold the oyster with the cupped side (the deeper, more rounded shell) facing down and the hinge facing towards you. Insert the tip of the oyster shucker into the hinge, applying gentle pressure and wiggling it to create a small gap.
Step 4: Opening the Oyster
Once you've created a gap, carefully slide the oyster shucker along the edge of the top shell, keeping it flush against the shell. As you slide, you'll feel the hinge give way. Use the leverage to pry the top shell completely off.
Step 5: Detaching the Muscle
With the top shell removed, you'll see the oyster sitting in the bottom shell. Carefully detach the muscle that's holding the oyster to the shell by sliding the oyster shucker underneath it. Be gentle and avoid damaging the oyster.
Step 6: Presentation and Enjoyment
Your freshly shucked oyster is now ready to be presented on a bed of crushed ice. Squeeze a bit of lemon juice over it, or add a dollop of mignonette sauce or a drop of hot sauce for an extra kick. Take a moment to appreciate your handiwork before savoring the delicate flavors.
Embark on Your Oyster Adventure
Shucking oysters may seem like a skill reserved for experts, but with the right tools and a bit of practice, anyone can enjoy the pleasure of freshly shucked oysters. Remember to prioritize safety, take your time, and savor the experience. And if you're looking for top-quality oysters to practice your newfound skills, we have got you covered with our wide selection of fresh oysters. So, gather your tools, choose your oysters, and embark on a journey from shell to plate that's as rewarding as it is delicious.